Step 1) Create an ASP.NET WEB APPLICATION
Step 2) Create a directory called Uploads
Step 3) add a new page called fileuploads.aspx
add 3 controls to it FileUpload control, 2. Label for status 3.Button control to initiate upload process.
<asp:FileUpload ID="FileUpload1" runat="server" Height="69px" Width="422px" />
</div>
<p>
<asp:Label ID="Label1" runat="server" Text="Label"></asp:Label>
</p>
<p>
<asp:Button ID="btnUpload" runat="server" onclick="btnUpload_Click"
Text="Upload" Width="220px" />
</p>
Step 4) Add button event handler in for btnUpload
protected void btnUpload_Click(object sender, EventArgs e)
{
try
{
String str = MapPath("~/Uploads/" + FileUpload1.FileName);
FileUpload1.SaveAs(str);
Label1.Text = FileUpload1.FileName + FileUpload1.FileContent.Length;
}
catch (Exception ex)
{
Label1.Text = ex.Message;
}
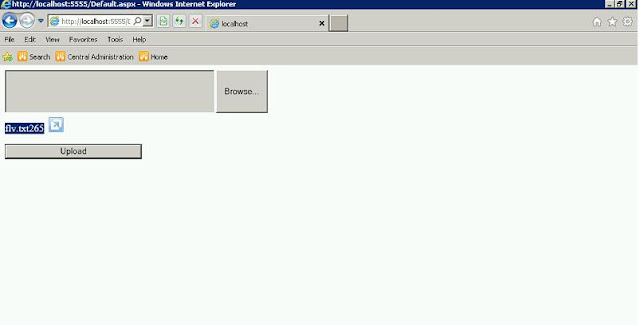
Step 5) Run the Application/F5
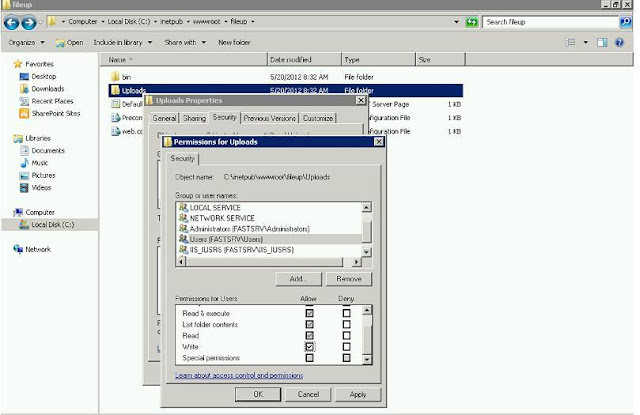
after uploading user will get "Access to the path 'C:\inetpub\wwwroot\fileup\Uploads\flv.txt' is denied."
Give permissions to upload directory...
1) select uploads directory --> right click--> properties-->security tab-->
select
Users(Servername\Users) --> edit
again select Users(Servername\Users) -> select write permission as shown below


No comments:
Post a Comment